An overflowing Gmail inbox is one of those problems that sneaks up on you. It starts with a few hundred unread emails. Then it becomes a few thousand. Before long, you are missing important messages, losing track of conversations, and spending more time searching for things than actually dealing with them.
The good news is that Gmail has a set of built-in tools specifically designed to solve this problem. Most people never use them properly. This guide shows you how to use labels, filters, tabs, and a few practical habits to turn a chaotic inbox into something you can actually navigate.
None of this requires technical skill. It does, however, require spending about thirty minutes setting things up properly — and that investment pays back every single day after.
Why Your Gmail Inbox Gets Chaotic
Before fixing the problem, it helps to understand why it happens in the first place.
Gmail was designed to handle high volumes of email. However, it does not organize anything automatically unless you tell it to. Every newsletter, promotional email, work message, and personal note lands in the same inbox by default. Over time, that single stream becomes impossible to manage.
Most people respond by searching for things reactively — typing a name or subject into the search bar whenever they need something. This works as a short-term workaround, but it is slower and less reliable than having a system. A well-organised inbox means you can find any email in seconds without relying on search.
The solution involves four things working together: tabs to separate broad categories automatically, labels to tag specific emails for easy retrieval, filters to sort incoming mail without manual effort, and a consistent approach to what you keep versus what you delete.
Step 1 — Enable and Configure Gmail Tabs
Gmail tabs are the horizontal categories that appear at the top of your inbox — Primary, Social, Promotions, Updates, and Forums. If you have not configured them, you may see all your email arriving in a single undivided inbox, or you may see tabs that are not showing the right content.
Tabs are Gmail’s first line of automatic organisation. They sort incoming emails into broad categories based on the sender and content type. Promotional emails from retailers go to Promotions. Social notifications go to Social. Newsletters and automated updates go to Updates. Personal and work messages go to Primary.
To enable or configure tabs, open Gmail in a browser and click the Settings gear icon in the top-right corner. Select See all settings from the dropdown. Click the Inbox tab at the top of the settings page. Under Inbox type, make sure Default is selected. Below that, you will see a section called Categories with checkboxes for Social, Promotions, Updates, and Forums. Tick the categories you want to appear as tabs and untick any you do not need. Click Save Changes.
For most users, enabling Promotions and Updates alongside Primary is the most useful setup. This immediately separates marketing emails and automated notifications from the conversations that actually require your attention. Your Primary tab becomes significantly less cluttered as a result.
Moving Emails Between Tabs
Gmail’s automatic sorting is good but not perfect. Sometimes a newsletter ends up in Primary, or a work notification lands in Updates. You can correct this easily. Right-click the email in question and select Move to tab, then choose the correct tab. Gmail will ask if you want to do this for all future emails from that sender — click Yes to teach Gmail your preference. It learns from these corrections over time.
Step 2 — Create Labels to Organise by Topic
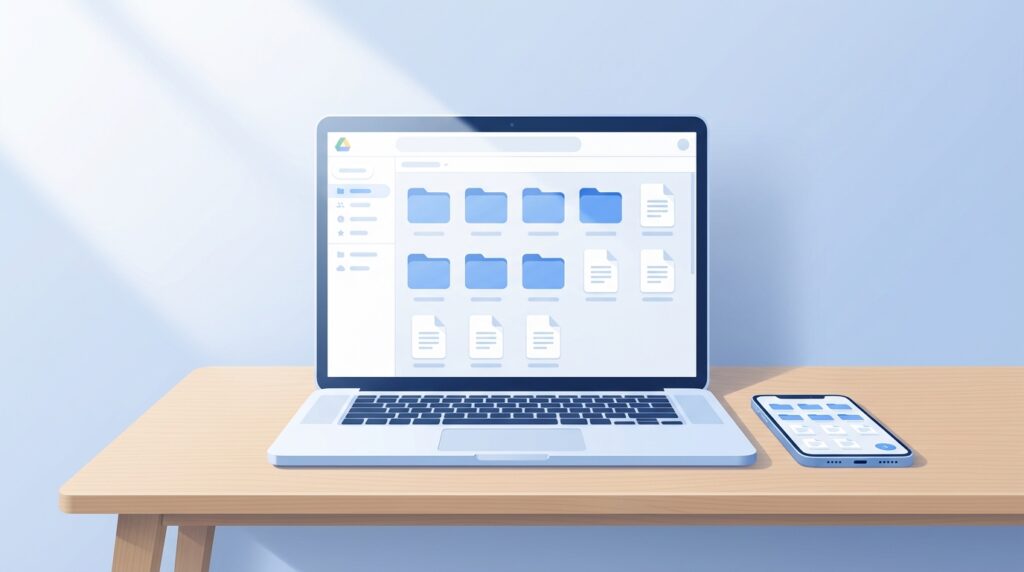
Gmail Labels are the equivalent of folders, with one important difference. A folder can hold a file in only one location. A label can be applied to an email alongside other labels, meaning one email can belong to multiple categories simultaneously. For example, an email about a client project could carry both a label for that client’s name and a label for the project type.
Labels appear in the left sidebar of Gmail and act as instant filters — click a label and Gmail shows you every email tagged with it, regardless of when it arrived or which tab it is in.
Creating a New Label
In the left sidebar of Gmail, scroll down until you see the Create new label option. Click it. Type a name for your label and click Create. The label appears immediately in your sidebar.
Alternatively, open any email, click the label icon in the toolbar at the top of the email view — it looks like a small tag — and either select an existing label or create a new one directly from that menu.
What Labels to Create
The labels that work best are the ones reflecting how you actually think about your email, not an idealised system you read about somewhere. Start with a small number of meaningful categories rather than trying to build an elaborate structure from the beginning.
A practical starting set for most people includes a label for work or each major client, a label for finances covering bank statements, invoices, and receipts, a label for important personal emails, a label for subscriptions and newsletters you want to keep, and a label for anything requiring a follow-up action. These five labels cover the majority of email types most people deal with.
Keep label names short and specific. A label called “Amazon orders” is more useful than one called “Online shopping and deliveries” because it is faster to scan and more precise to search within.
Using Nested Labels
Gmail allows you to create nested labels — labels within labels — which work like subfolders. For example, you could have a parent label called Work with nested labels inside it for each project or client. To create a nested label, click Create new label, type the label name, and tick the box that says Nest label under, then choose the parent label from the dropdown.
Nested labels are useful when you have a large number of labels and want to group related ones together. However, they add complexity. If you are setting up your system for the first time, start with flat labels and only add nesting if you find yourself with more labels than you can comfortably scan in the sidebar.
Step 3 — Set Up Filters to Sort Emails Automatically
Labels become dramatically more powerful when combined with filters. A filter is an automatic rule that tells Gmail to do something specific whenever an email arrives that matches certain criteria — apply a label, skip the inbox, mark it as read, star it, or archive it.
Filters are what make your organisation system self-maintaining. Instead of manually labelling every email as it arrives, you set up filters once and Gmail handles the sorting automatically from that point forward.
Creating a Filter
Click the Settings gear icon and select See all settings. Click the Filters and Blocked Addresses tab. Scroll to the bottom and click Create a new filter.
A filter creation window opens. This is where you define the criteria that trigger the filter. You can filter by sender address, recipient, subject line keywords, whether the email has an attachment, or a combination of these. For example, to filter all emails from your bank, enter your bank’s email domain in the From field — something like noreply@yourbank.com or the domain @yourbank.com to catch all emails from that sender.
Click Create filter with this search. On the next screen, choose what Gmail should do when the criteria are met. The most useful options for organisation are Apply the label — select or create the label you want these emails tagged with — and Skip the Inbox, which means the email is labelled and archived automatically without appearing in your inbox at all. This is particularly useful for emails you want to keep for reference but do not need to action — bank statements, subscription confirmations, order receipts.
Tick Also apply filter to matching conversations if you want Gmail to apply the label to all existing emails that match the criteria, not just future ones. Then click Create filter.
Practical Filters Worth Setting Up Immediately
Setting up a few targeted filters immediately makes a noticeable difference to inbox clarity.
Create a filter for newsletters and marketing emails you want to keep but do not need to see immediately. Filter by the sender’s domain or by keywords like “unsubscribe” in the email body — most marketing emails contain this word. Apply a label called Newsletters and tick Skip the Inbox. These emails will be saved and labelled automatically without cluttering your Primary inbox.
Create a filter for order and delivery confirmations. Filter by common subject line keywords like “order confirmation,” “your order,” or “shipping update.” Apply a label called Orders and tick Skip the Inbox. You can check this label whenever you need to track a delivery without these emails filling your inbox daily.
Create a filter for any regular automated reports or notifications you receive — calendar invites, software alerts, system notifications. Apply a label and skip the inbox for these too. Your Primary inbox then contains only emails that genuinely need your attention.
Step 4 — Use Stars and Priority Markers for Actionable Emails
Labels and filters handle the categorisation and archiving of email. Stars handle something different — they flag specific emails that require action or follow-up.
Gmail’s star system is simple. Click the star icon beside any email to mark it. Starred emails are accessible instantly through the Starred section in the left sidebar. Use stars for emails you need to reply to, emails containing information you will need to reference soon, or emails where you are waiting for a response and want to follow up.
Gmail also offers multiple star colours and symbols for users who want a more granular system. To enable these, go to Settings, select See all settings, and scroll down the General tab until you see the Stars section. Drag additional star types into the In use row. You can then cycle through different star types by clicking the star icon repeatedly.
In practice, most people find a single star type sufficient. A more elaborate star system is only worth the extra complexity if you deal with a high volume of emails requiring different types of follow-up action daily.
Step 5 — Archive Rather Than Delete
One habit that makes a significant difference to inbox management is archiving emails instead of deleting them. Many people leave read emails sitting in their inbox indefinitely because they are not sure whether they will need them again. Others delete everything aggressively and then regret it when they need something they removed.
Archiving is the middle ground. An archived email disappears from your inbox but remains fully searchable and accessible through the All Mail section in the left sidebar. It does not count against your inbox clutter, but it is never permanently gone unless you specifically delete it.
To archive an email, select it and press the E key on your keyboard — Gmail’s archive shortcut. Alternatively, click the archive icon in the toolbar at the top of an open email. To archive multiple emails at once, tick the checkboxes beside them and click the archive icon in the top toolbar.
Get into the habit of archiving any email you have read and dealt with. Your inbox should only contain emails that require action or that you have not yet read. Everything else belongs in the archive, where labels and search make it easy to find when needed.
Step 6 — Unsubscribe From What You No Longer Read
Filters and labels manage the email that arrives. Unsubscribing reduces how much arrives in the first place. These two approaches work together — filters handle the inevitable remainder, and unsubscribing reduces the volume that filters have to deal with.
Gmail makes unsubscribing straightforward. Open any marketing or newsletter email and look for the Unsubscribe link that Gmail often displays in blue text beside the sender’s name at the top of the email, before you even scroll down to find the link in the email body. Click it and follow the confirmation step.
A practical approach is to spend fifteen minutes going through your Promotions tab and unsubscribing from anything you have not opened in the last three months. Be ruthless — you can always resubscribe if you miss something, which almost never happens. Reducing the incoming volume is the most durable long-term fix for inbox overload.
Step 7 — Use Gmail Search Operators for Quick Retrieval
Even with a well-organised inbox, there will be times when you need to find a specific email quickly. Gmail’s search operators let you search with precision rather than relying on a single keyword and scrolling through results.
Typing from:name in the search bar shows all emails from a specific sender. Using subject:keyword shows all emails with that word in the subject line. Combining has:attachment with a keyword finds emails from a specific sender that include attachments. Typing is:unread filters to show only unread emails. Using before:2024/01/01 or after:2024/01/01 narrows results to a specific date range.
These operators can be combined. For example, searching from:boss@company.com has:attachment after:2024/06/01 finds all emails from a specific sender that include attachments received after a certain date. This level of precision makes finding anything in Gmail fast, regardless of how many emails your account contains.
Maintaining the System
An organised inbox requires occasional maintenance to stay that way. The setup work you do initially handles most of the ongoing sorting automatically through filters. However, new types of email arrive over time that your existing filters do not cover.
Set aside ten minutes once a week — Friday afternoon works well for many people — to process anything sitting in your inbox that does not belong there. Apply labels to anything untagged. Create new filters for any new recurring email types. Archive anything you have dealt with. Unsubscribe from anything new that is cluttering the Promotions tab.
That ten-minute weekly habit, combined with the filters and labels you set up initially, is enough to keep even a high-volume inbox manageable indefinitely.
Conclusion
An organised Gmail inbox is not about achieving inbox zero or maintaining a perfect system. It is about being able to find what you need quickly, knowing what requires your attention, and not wasting time scrolling through irrelevant emails looking for something important.
The tools are all there inside Gmail already. Tabs separate the noise from what matters. Labels make everything retrievable. Filters automate the sorting. Archiving clears the clutter. Unsubscribing reduces the volume. Together, these five things transform how Gmail feels to use.
Start with tabs and one or two filters today. Add labels as you identify the categories that make sense for your email habits. The system builds itself naturally once you start, and it gets easier to maintain the longer it is in place.
Once your inbox is under control, the next step many people find useful is learning how to use Gmail’s filters and labels in more depth. Our guide on how to use Gmail filters and labels covers the more advanced filter combinations and label structures that make a real difference for high-volume inboxes.
Frequently Asked Questions
Will setting up labels and filters affect emails I have already received?
Filters only apply to incoming emails by default. However, when creating a filter, Gmail gives you the option to tick Also apply filter to matching conversations. Ticking this applies the filter action — labelling, archiving, or marking as read — to all existing emails that match your filter criteria, not just future ones. This is useful when setting up your system for the first time, as it organises your existing inbox alongside incoming mail.
How many labels should I create in Gmail?
There is no fixed number, but fewer is generally better when starting out. Begin with five to eight labels that reflect the main categories of email you receive. Add more over time only when you find yourself regularly needing a category that does not exist yet. A large number of labels quickly becomes its own source of confusion if the categories overlap or if too many labels apply to most emails you receive.
Is it safe to use the Unsubscribe link in Gmail?
For emails from legitimate senders — retailers, newsletters, services you signed up for — clicking unsubscribe is safe and effective. Gmail displays an Unsubscribe link at the top of these emails only when it has verified the sender as legitimate. For suspicious emails from senders you do not recognise, do not click any links including unsubscribe links. Instead, mark the email as spam so Gmail can learn to filter it.
What is the difference between archiving and deleting in Gmail?
Archiving removes an email from your inbox but keeps it in your account indefinitely. It remains fully searchable and accessible through the All Mail section. Deleting moves an email to the Trash folder, where it is permanently deleted after 30 days. For most emails, archiving is the better choice because it keeps your inbox clear without permanently losing anything you might need later.
Can I access Gmail labels on my phone?
Yes. Labels created in Gmail on a desktop browser are fully accessible in the Gmail mobile app on both Android and iOS. Open the app and tap the three-line menu icon to see your labels listed in the sidebar. You can apply labels to emails from the mobile app and view all emails under a specific label just as you would on desktop.
How do I find emails I have archived in Gmail?
Click All Mail in the left sidebar of Gmail to see every email in your account, including archived ones. If you applied a label to an email before archiving it, you can also find it by clicking the relevant label in the sidebar. Alternatively, use the Gmail search bar — archived emails are fully searchable alongside everything else in your account.