Google Docs is one of the most widely used writing tools in the world, and for good reason. It is free, works in any browser, saves your work automatically, and makes collaboration with others remarkably simple. Yet a surprising number of people who use it regularly have never properly learned how it works — they just muddle through and hope for the best.
If you are using Google Docs for the first time, or you have been using it for a while but feel like you are only scratching the surface, this guide is for you. By the time you finish reading, you will know how to create and format documents, share them with others, work offline, leave and respond to comments, and use the features that actually make a difference in everyday use.
No prior experience needed. Just a Google account and a few minutes to get started.
What Google Docs Is and Why People Use It
Google Docs is a free online word processor — the Google equivalent of Microsoft Word. You use it to write, format, and edit text documents. Reports, essays, letters, meeting notes, project briefs, CVs — anything you would traditionally write in Word can be written in Google Docs instead.
The key difference between Google Docs and traditional word processors is where your documents live. In Word, documents are saved as files on your computer. In Google Docs, documents are saved automatically to your Google Drive — Google’s cloud storage service — as you type. There is no Save button to click, no risk of losing work because the power went out, and no need to email yourself a copy to open on a different device.
The other major difference is collaboration. Sharing a Word document with someone typically means attaching it to an email, waiting for them to edit it, and then receiving a new version back — with no easy way to track what changed. With Google Docs, you share a link. The other person opens the same document in their browser. You can both be editing it at the same time, see each other’s changes in real time, and leave comments for each other without ever sending a single attachment.
For these reasons, Google Docs has become the default writing tool for students, remote workers, freelancers, small business owners, and anyone who regularly needs to create or collaborate on written documents.
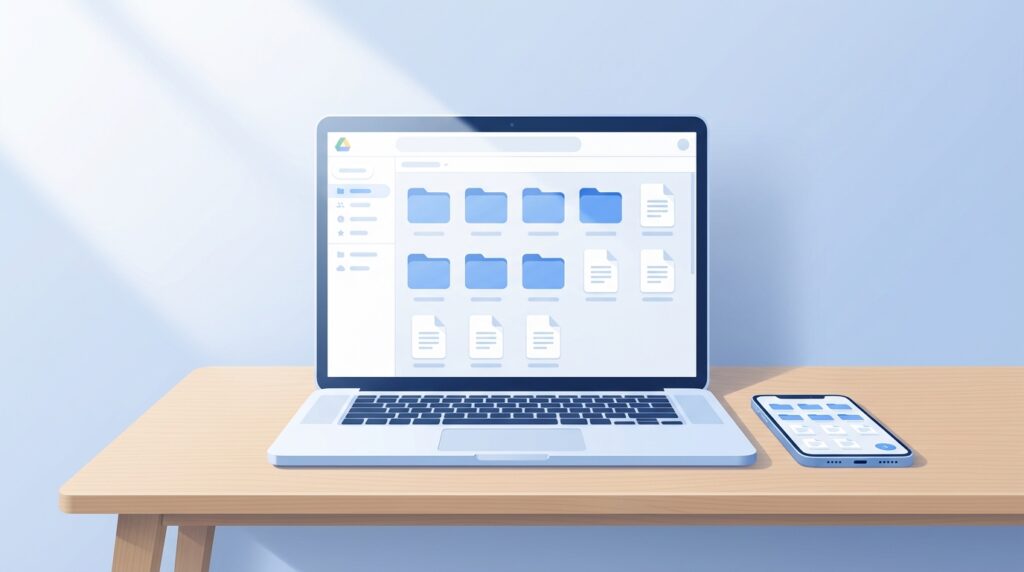
Google Docs lives inside Google Drive, which is where all your documents are stored and organised. If you have not set up Google Drive yet, our beginner’s guide to Google Drive explains how it works and how to get started.
How to Create Your First Google Doc
There are a few ways to create a new document, and all of them take about five seconds.
From Google Drive
Go to drive.google.com and sign in with your Google account. Click the New button in the top-left corner of the screen. From the dropdown menu that appears, hover over Google Docs and select Blank document. A new, empty document opens in a new browser tab and is saved to your Drive automatically.
Directly From the Browser
If you want to skip Drive entirely and go straight to a new document, type docs.new into your browser address bar and press Enter. A blank Google Doc opens immediately. It is one of the fastest ways to start writing when you are in a hurry.
From a Template
Google Docs includes a template gallery with ready-made layouts for common document types — resumes, letters, project proposals, meeting notes, and more. To access it, go to docs.google.com and look for the Template gallery at the top of the page. Click any template to open a pre-formatted document you can edit straight away. Templates are a useful starting point when you want a professional-looking document without building the formatting from scratch.
Understanding the Google Docs Interface
When you open a new document, the interface is clean and straightforward. Here is what each part does.
The Document Title
At the very top of the page, above the menu bar, you will see the text “Untitled document.” Click on it and type a name for your document. Naming your document immediately is a good habit — it makes the file easier to find in Drive later and prevents your storage from filling up with dozens of files all called “Untitled document.”
The Menu Bar
Just below the document title sits a row of menus — File, Edit, View, Insert, Format, Tools, Extensions, and Help. These contain every feature available in Google Docs. Most of what you need day to day is accessible from the toolbar directly below the menu bar, but the menus are where you go for less common actions like checking word count, setting up page layout, or accessing document settings.
The Toolbar
The toolbar is the row of icons and dropdown menus sitting just above the white page area. This is where you will do most of your formatting work — changing fonts, adjusting text size, making text bold or italic, adding bullet points, aligning paragraphs, and so on. If you have used Microsoft Word or any other word processor, the toolbar will look immediately familiar.
The Document Area
The white space below the toolbar is the document itself. Click anywhere on the page and start typing. That is genuinely all there is to it. Google Docs saves every change automatically, so you never need to worry about losing your work.
The Share Button
In the top-right corner of the screen sits a blue Share button. This is how you give other people access to your document. We will cover sharing in detail later in this guide.
How to Format Text in Google Docs
Formatting makes documents easier to read and more professional in appearance. Google Docs gives you all the tools you need to format text clearly without overwhelming you with options.
Basic Text Formatting
Select any text by clicking and dragging over it, then use the toolbar to apply formatting. The most commonly used options are Bold, which makes text heavier and more prominent; Italic, which tilts text for emphasis or titles; and Underline, which draws a line beneath text. You can apply these using the B, I, and U buttons in the toolbar, or with keyboard shortcuts — Ctrl+B for bold, Ctrl+I for italic, and Ctrl+U for underline on Windows, or Cmd+B, Cmd+I, and Cmd+U on a Mac.
Changing Font and Text Size
The font name and text size are both shown in the toolbar near the left side. Click the font name dropdown to choose a different font from the list. Click the number showing the current text size and type a new number, or use the plus and minus buttons beside it to increase or decrease the size. For most documents, a size between 11 and 12 points with a clean font like Arial or Georgia works well.
Using Headings
Headings are one of the most important formatting tools in any document. They break your content into clearly labelled sections, make the document easier to scan, and — if you are writing for the web — help search engines understand the structure of your content.
To apply a heading, click anywhere in the line of text you want to make a heading, then click the Styles dropdown in the toolbar — it usually shows “Normal text” by default. Select Heading 1 for a main section heading, Heading 2 for a subsection, or Heading 3 for a smaller subsection within that. Google Docs applies consistent formatting to each heading level automatically, and you can customise the appearance if needed.
Paragraph Alignment
The toolbar includes alignment buttons that control how text sits on the page — left-aligned, centred, right-aligned, or justified. Most documents use left alignment for body text, which is the default. Centred alignment is common for titles or headings in formal documents. Justified alignment spreads text evenly across the full width of the line and is often used in printed documents.
Bullet Points and Numbered Lists
To create a bullet point list, click the bullet list icon in the toolbar — it looks like three short lines with dots beside them. Each time you press Enter, a new bullet point is created. Press Tab to indent a bullet point and create a sub-item. Press Enter twice or Backspace on an empty bullet to exit the list.
Numbered lists work identically, using the numbered list icon in the toolbar instead. Use numbered lists when the order of items matters — steps in a process, for example. Use bullet points when the order does not matter.
Line Spacing
To adjust the spacing between lines, click Format in the menu bar, select Line and paragraph spacing, and choose from the preset options — Single, 1.15, 1.5, or Double. For most documents, 1.15 or 1.5 spacing makes body text easier to read without wasting too much space on the page.
How to Use the Outline and Document Map
Once your document has headings, Google Docs generates an automatic outline that appears in a panel on the left side of the screen. If you cannot see it, click View in the menu bar and select Show outline.
The outline lists every heading in your document and lets you jump to any section instantly by clicking its name. In a long document, this is far faster than scrolling. It also gives you a bird’s-eye view of your document structure so you can see at a glance whether the overall organisation makes sense.
How to Share a Google Doc With Someone
Sharing is one of the features that makes Google Docs stand apart from traditional word processors. Instead of attaching a file to an email, you share a link — and you control exactly what the other person can do with it.
Sharing With a Specific Person
Click the blue Share button in the top-right corner of the document. A sharing window opens. Type the email address of the person you want to share with into the field at the top. Before clicking Send, check the permission dropdown beside their email address and choose the appropriate level.
Viewer means they can read the document but not make any changes. Commenter means they can leave comments and suggestions but cannot directly edit the text. Editor means they can make any changes they like, including deleting content. Choose carefully — if you are sharing a document for review only, Commenter is usually the right choice. If you are collaborating and want the other person to be able to make changes directly, choose Editor.
Sharing Via a Link
In the same sharing window, look for the section labelled General access. By default it is set to Restricted, which means only people you have specifically invited can open the document. If you want to share the document more broadly — with a team, a class, or anyone who receives the link — click the dropdown and change it to Anyone with the link. Then set the permission level for link recipients and click Copy link. Paste the link wherever you need to share it.
Real-Time Collaboration
When two or more people have the same document open at the same time, you can see each other’s cursors moving around the page in different colours. Changes made by one person appear instantly for everyone else. This makes live collaboration genuinely practical — two people can work on different sections of the same document simultaneously without any confusion about which version is current.
How to Use Comments and Suggestions
Comments and suggestions are essential tools for anyone using Google Docs for collaborative work, whether that is editing a colleague’s report, giving feedback on a student’s essay, or reviewing your own writing before finalising it.
Leaving a Comment
Select the text you want to comment on, then click Insert in the menu bar and select Comment, or use the keyboard shortcut Ctrl+Alt+M on Windows or Cmd+Option+M on Mac. A comment box appears in the right margin of the document. Type your comment and click Comment to post it. The selected text becomes highlighted, and anyone with access to the document can see the comment and reply to it.
To resolve a comment once it has been addressed, click the tick icon in the top-right corner of the comment box. This removes the comment from the active view but keeps a record of it in the comment history, which you can access through the Comments button in the top-right corner of the document.
Using Suggestion Mode
Suggestion mode is one of the most useful features in Google Docs for collaborative editing. Instead of making changes directly to the document, suggestions appear as tracked edits that the document owner can accept or reject one by one.
To switch to suggestion mode, click the pencil icon in the top-right corner of the document — it sits just below the Share button — and select Suggesting from the dropdown. Now any changes you make appear as coloured tracked edits rather than permanent changes. The document owner sees each suggestion highlighted and can click the tick to accept it or the cross to reject it. This is the cleanest way to edit someone else’s document without overwriting their work directly.
How to Work on Google Docs Offline
Google Docs requires an internet connection by default, but you can enable offline access so you can continue working when you are not connected.
To set this up on a computer, you need Google Chrome and the Google Docs Offline extension installed. Open Chrome, search for Google Docs Offline extension in the Chrome Web Store, and install it. Once installed, open Google Drive, click the Settings icon, select Settings, and tick the box that says Create, open and edit your recent Google Docs, Sheets and Slides files on this device while offline.
After enabling this, your recent documents will be available to open and edit without an internet connection. Any changes you make offline are saved locally and sync back to the cloud automatically the next time you connect.
On mobile, offline access works through the Google Docs app. Open the app, tap the three-dot menu beside any document, and select Make available offline. That document will be accessible without a connection from that point forward.
How to Check Word Count, Find and Replace, and Other Useful Tools
These are small features that are easy to miss but genuinely useful in regular use.
Word Count
Click Tools in the menu bar and select Word count. A window shows you the total number of pages, words, characters, and characters excluding spaces. You can also tick the box that says Display word count while typing, which adds a small word count indicator to the bottom-left corner of the document that updates as you write.
Find and Replace
To find a specific word or phrase in a document, press Ctrl+F on Windows or Cmd+F on Mac. A search bar appears at the top-right of the document. Type what you are looking for and Google Docs highlights every instance in the document. To replace a word throughout the document — useful when a name or term changes — press Ctrl+H on Windows or Cmd+H on Mac to open the Find and Replace tool. Type the original word in the Find field and the replacement word in the Replace with field, then click Replace all.
Voice Typing
Google Docs includes a built-in voice typing feature that lets you dictate text rather than type it. Click Tools in the menu bar and select Voice typing. A microphone icon appears on the left side of the document. Click it and start speaking — Google Docs transcribes your words in real time. It is reasonably accurate for clear speech in a quiet environment and can be a useful alternative to typing for longer documents.
Version History
Google Docs automatically saves the full history of every change made to a document. To see it, click File, select Version history, then click See version history. A panel opens on the right showing a timeline of saved versions. Click any version to see what the document looked like at that point. If you want to restore a previous version, click Restore this version at the top of the screen. This is invaluable if you accidentally delete a large section of text or want to retrieve an earlier draft.
How to Download a Google Doc as a Word or PDF File
Google Docs stores your documents in its own format by default, but you can download them in other formats whenever you need to — for example, when someone requests a Word file or a PDF.
Click File in the menu bar and select Download. A submenu appears with format options including Microsoft Word (.docx), PDF Document (.pdf), Plain Text (.txt), and others. Click your preferred format and the file downloads to your device immediately. The original document remains in Google Drive unchanged — downloading creates a separate copy in the format you chose.
Conclusion
Google Docs is a genuinely capable writing tool that most people underuse simply because they never took the time to learn what it can do. The basics — creating, formatting, and saving documents — are straightforward enough to pick up in minutes. The more powerful features — real-time collaboration, suggestion mode, version history, and offline access — are what make it worth using seriously.
The best way to build confidence with Google Docs is to use it for real work rather than experimenting with test documents. Write something you actually need — a letter, a report, a list — and use it as an opportunity to explore the features covered in this guide. Each one will become second nature faster than you expect.
Once you are comfortable creating and editing documents, the next useful skill is learning how to share them effectively and control who can see or edit your work. Our guide on how to share a Google Doc with someone covers every sharing option in detail, including how to set permissions, generate shareable links, and remove access when a project is finished.
Frequently Asked Questions
Is Google Docs completely free?
Yes. Google Docs is free for anyone with a Google account. There are no hidden charges for the word processor itself. The only cost you might eventually encounter is if you exceed the 15 GB of free Google Drive storage that comes with every Google account, at which point you would need to pay for additional storage through Google One. For most users, 15 GB is more than sufficient for document storage alone.
Does Google Docs work without an internet connection?
Yes, but you need to set up offline access in advance. On a computer, this requires Google Chrome and the Google Docs Offline extension. On mobile, you enable offline access through the Google Docs app on a file-by-file basis. Once offline access is enabled, you can open and edit documents without a connection, and your changes sync automatically when you reconnect.
Can I use Google Docs on my phone?
Yes. Google Docs has a mobile app available for both Android and iOS. The app supports most of the same features as the browser version, including editing, formatting, commenting, and sharing. Some advanced features are easier to use on a desktop browser, but the app is fully functional for everyday document work on the go.
What is the difference between Google Docs and Microsoft Word?
Both are word processors used to create and edit text documents. The main differences are that Google Docs is entirely browser-based and free, saves automatically to the cloud, and makes real-time collaboration straightforward. Word is a desktop application that historically saved files locally, though Microsoft has added cloud features through OneDrive. Word has more advanced formatting and layout options for complex documents. For most everyday writing tasks, Google Docs does everything most people need without any cost or installation.
Can I convert a Google Doc to a Word document?
Yes. Click File, select Download, and choose Microsoft Word (.docx). The document downloads to your device as a Word file. The original Google Doc remains in your Drive unchanged. Formatting is generally preserved well in the conversion, though very complex layouts may occasionally need minor adjustments after converting.
How do I stop someone from editing my Google Doc?
Open the document, click the Share button, find the person’s name in the sharing window, and click the permission dropdown beside their name. Change their access from Editor to Viewer or Commenter, or select Remove access to revoke their access entirely. Changes take effect immediately.
Does Google Docs automatically save my work?
Yes. Google Docs saves every change automatically as you type. You will see a brief “Saving” message in the top bar followed by “All changes saved to Drive” when it is done. There is no Save button and no need to manually save. Your work is preserved even if your browser closes unexpectedly or your device loses power mid-session.